 A few years back, I posted photos of our rice sensory bin on my personal Facebook page. A lot of you asked how we made it.
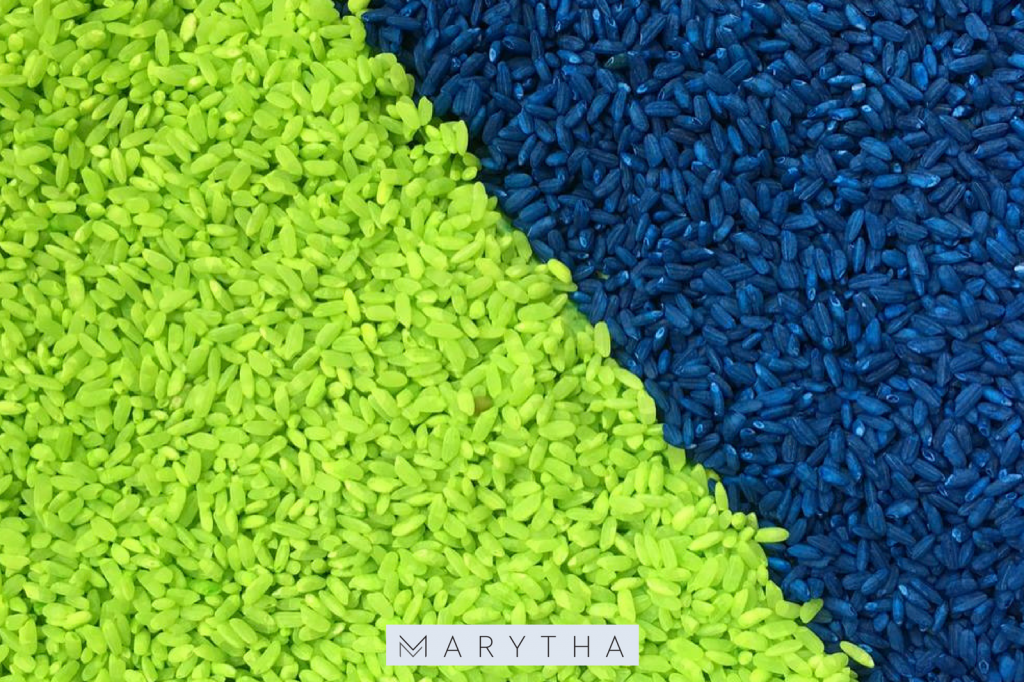
I’m sharing with you today the 4 easy steps to making a rice sensory bin.
Let’s start, shall we?
[mv_create title=”Quick and Easy Rice Sensory Bin” key=”3″ thumbnail=”https://marytha.com/wp-content/uploads/2018/02/rice_sensory_bin1.png” type=”diy”]
…. And there you go, vibrant colored rice!
BENEFITS OF SENSORY BINS
Our favorite activities at home with our toddler involve sensory bins. They strengthen children’s fine motor skills and coordination. All that scooping, pouring, digging and sifting promotes exploration and creativity through play.
Sensory bins also encourage social and problem-solving skills when they play with other children or their siblings. They learn to take turns and work with others.
SENSORY BIN IDEAS
Use bins, boxes, and bowls you have around the house. I repurposed our Ikea Samla storage box for this activity and raided our kitchen for a few bits and bobs. Spoons, funnels, cups, ice cube trays and sifters are great examples.
Our favorite activity with sensory bins is the “treasure hunt”. I hide flashcards, plastic eggs, pompoms and shapes under the rice and Seth will scoop or dig out the rice to search for them.
There’s something about seeking and finding that really excites children. It has been a wonderful help for letter, color, shapes and number recognition.
What other activities can you do with sensory bins? There are loads.
However, I found that the best activity is to give kids the chance to have unstructured play. You will be surprised at how creative they can get. They learn to improvise and think outside the box. Seth loves to use it as a dirt road for his cars, pretend he is selling at a market or feeding his animal toys.

Oh and yes, prepare for rice fallouts after each play. Sensory bins are messy. Tablecloths or blankets on the bottom of the bin will definitely help for easier cleanup.
At home, we encourage the boys to clean up after they play. Seth finds cleaning extremely fun. He gets to sweep the floor using a broom and dustpan. The rest of the mess gets vacuumed.
I hope you find this sensory bin tutorial helpful. Go forth and make your quick and easy DIY sensory bin. Try it on pasta or beans.
Now, it’s time for the kiddos to dig in!

Leave a Reply